
One of the biggest challenges of articulated wings is how to make it move while still looking like a natural bird wing. A lever joint like we’ve made so far doesn’t look like a natural bird joint. So, we disguised it.
The next section will depend a great deal on the size and shape of your set of wings, so I don’t have any specific measurements. What you’ll need is the following:
- Cardboard (for experimenting)
- Thick craft foam, or some other stiff material
- A fast setting glue, like Gorilla glue
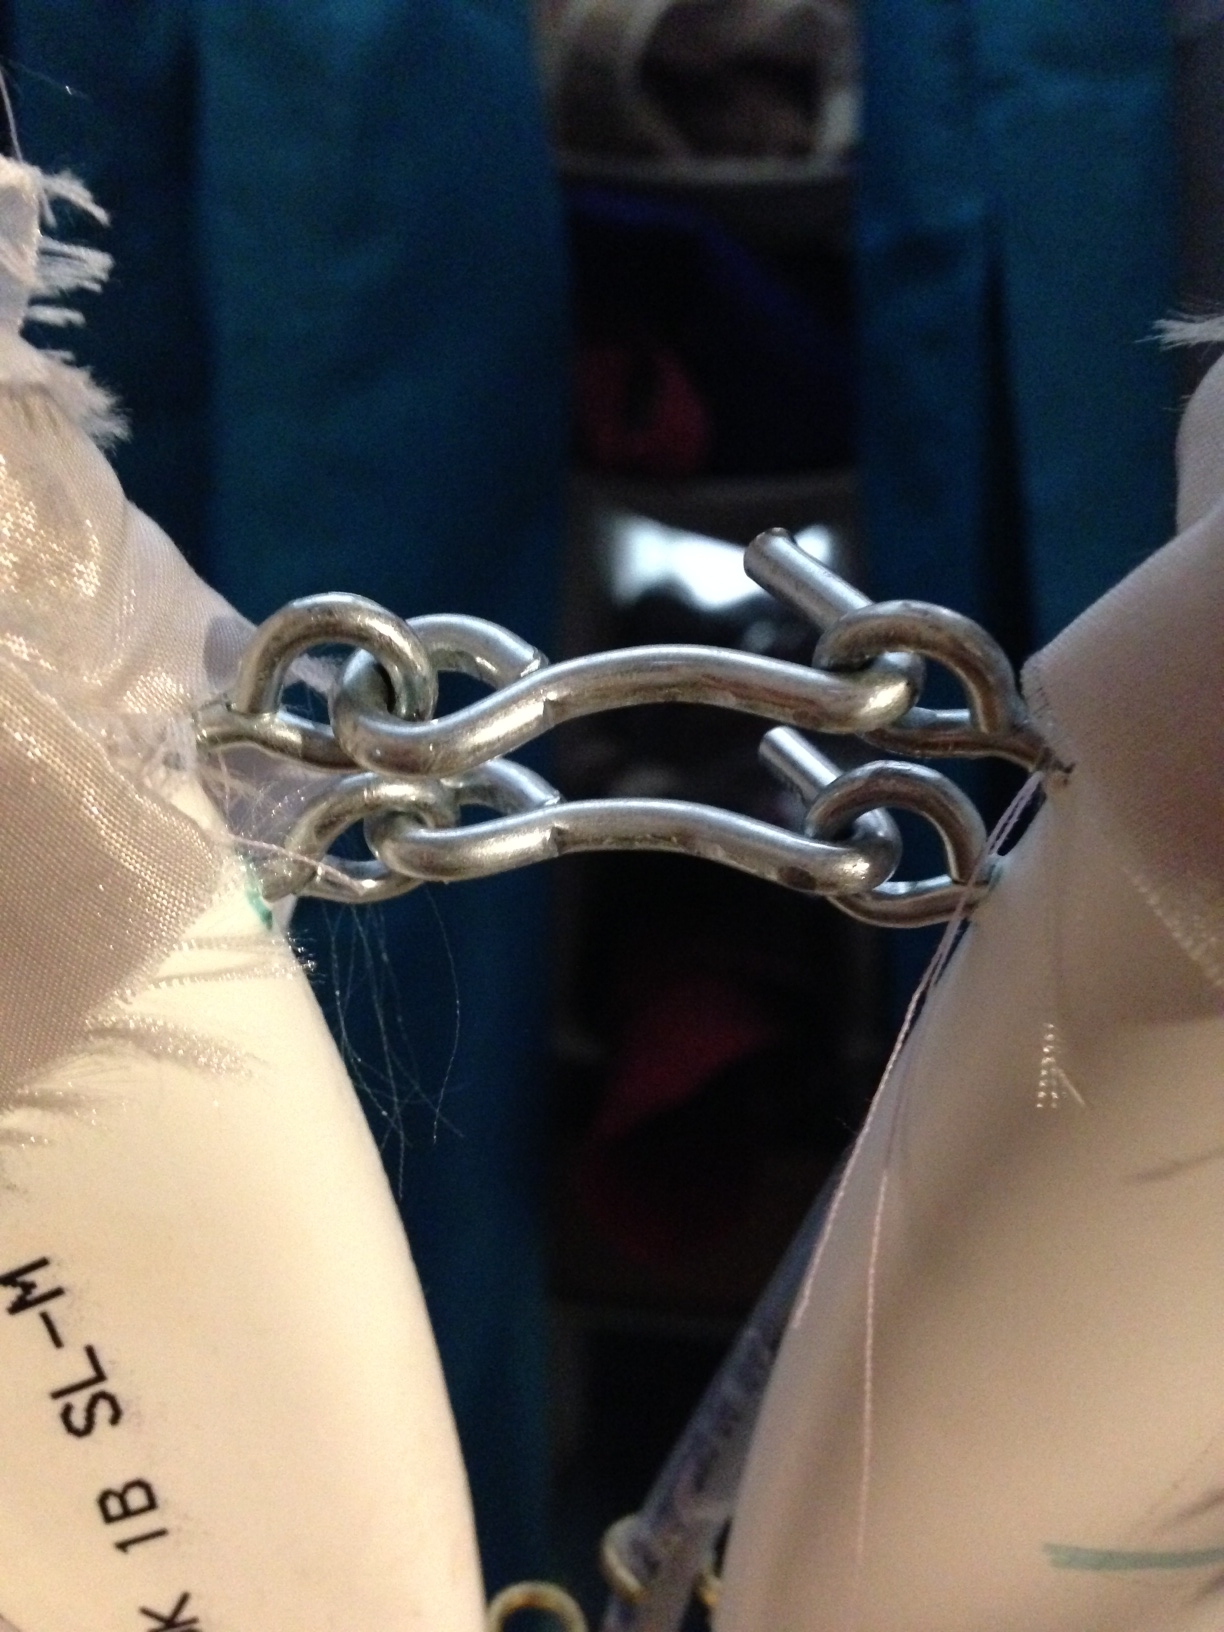
- Lots of 1/4 in eyelet screws (like you got for the last part)
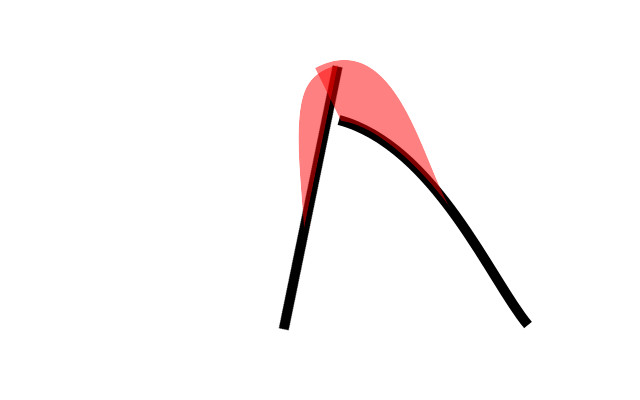
Here’s the basic idea: you’re going to create a craft foam enclosure on the section of PVC that’s held against your back. The lever portion of the wing will then rotate into the enclosure. Here are some pics to help explain. The black lines are the PVC structure of your wings. The red bits are craft foam. Here’s what the wing looks like when it’s down.
And here’s what it looks like when you pull on the wire to extend the wing. Notice how the outer piece rotates INTO the inner piece.
In this picture, the craft foam piece on the right piece of the wing is like a slot. I cut out two shapes (approximately like the one above) and glued them to either side of the PVC. Then I cut out a really long, thin isosceles triangle to make the top of the slot. The top of the slot piece is about 2 inches at the base of the triangle, and slowly tapers off to a point… you know… like a triangle. Glue the two side pieces of craft foam to the edges of this triangle so that the widest part is at the opening of the slot. If all goes well, there should be enough room for the outer piece (the left side in this pic) to rotate inside that slot.
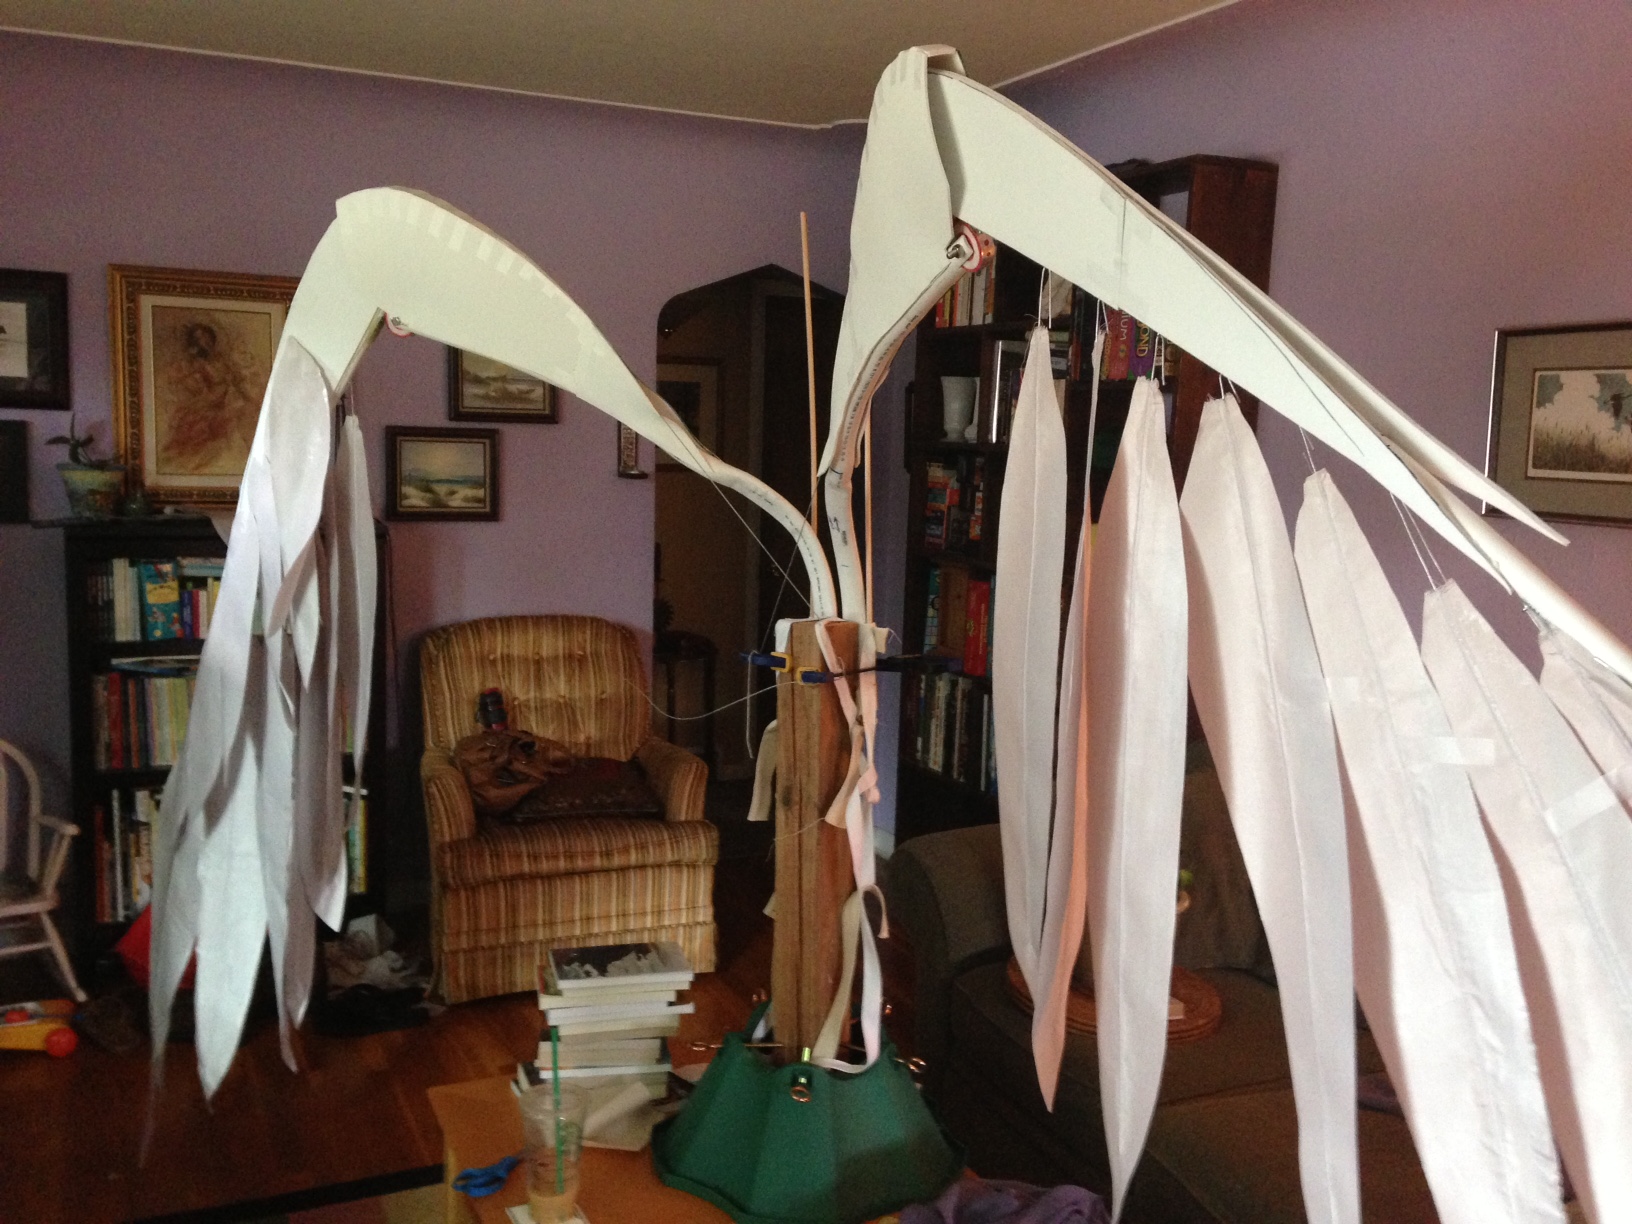
There’s also some craft foam on the outer piece of PVC (the part that moves) as well. These pieces of craft foam are just glued to either side of the PVC, and to each other at the top. The sole purpose of this section of craft foam is to maintain the curve of the wing. Here’s a pic of the wings in progress that I excavated from my phone:

In this pic, I have the wings extended a little to make them easier to work on, so the outer (lever like) section is rotated into the craft foam slot.
And now feathers…
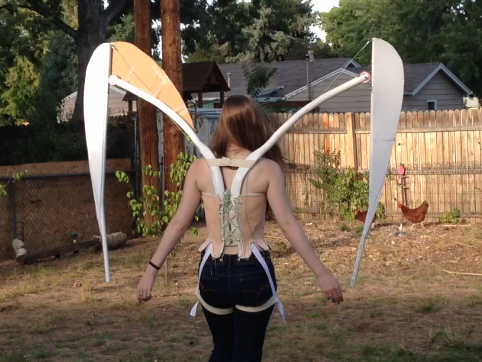
At this point, you have the structure of your articulated wings. The next thing you’ll want to do is attach your feathers. We used incredibly stiffened fabric (since we wanted impossibly large feathers), but you can use whatever you want! That said, I do have a couple of notes on how we rigged the feathers that might be useful to you.
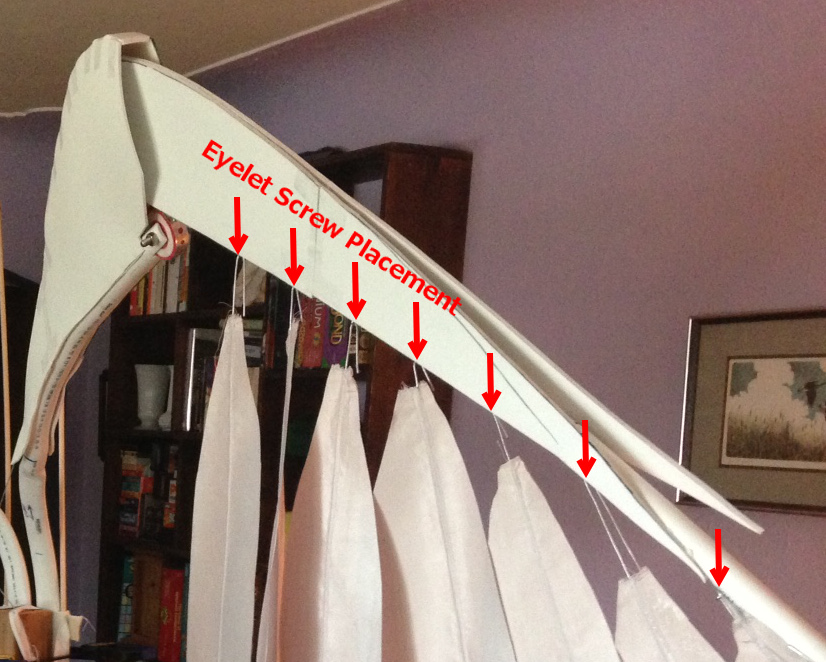
First off, the primary feathers. Those are the giant feathers hanging on the outer part of the wing. Since the wings articulate, the primary feathers need to move as well. We wanted them to splay when the wing extended, and then collapse back in on themselves when the wings folded down. This is where gravity is your friend, and where all the eyelet screws come into play.
The primary feathers actually hang from the bottom of the wing. We screwed in the eyelets along the bottom of the PVC pipe where we wanted the feathers to be. Our primary feathers each had a wire core, so we just looped the end of the wire through the eyelet so that the feathers would hang freely.
At this point, regardless if you have the wings splayed or folded, the feathers will just point downwards. Because gravity. To splay the feathers when the wings are extended, we needed to stop the feathers from continuing to point downward. So (by the power of fishing line!), that’s what we did. To explain, behold my handy-dandy color coded picture:
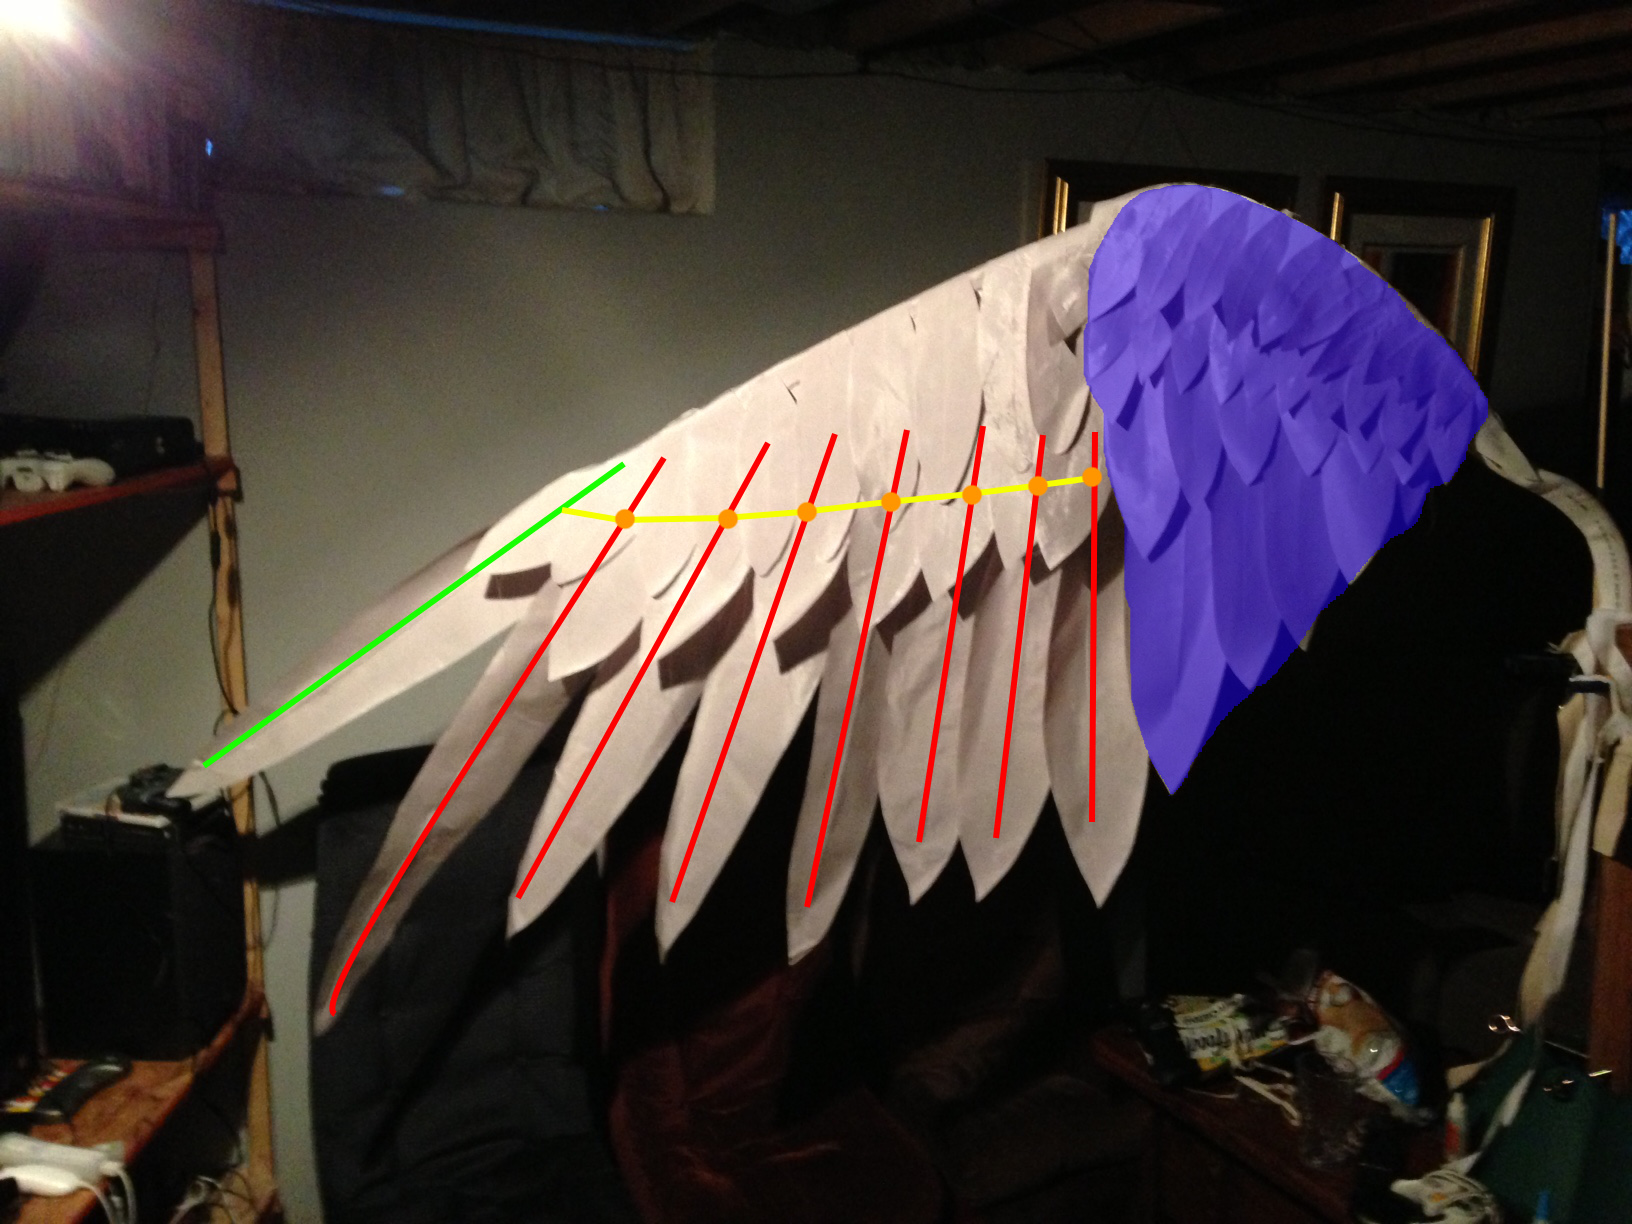
What we have here is the following: Nothing in the blue section moves. It is all attached to the inner part of the wing (the static half that is strapped to your back). The red lines are the wires in our fabric feathers. The yellow line is the fishing line that connects the wires, and the orange dots denote a knot affixed to the wires.
The basic principle is this: when the wings splay, the fishing line goes taught and pulls the primary feathers upwards. When the wing folds back downward, the fishing line loosens, and gravity returns the feathers so that they point downward again. Yay gravity!
What is the green line? That particular feather is just glued to the end of the PVC. It doesn’t move, but continues the line of the wing.
I really hope all of that makes sense.
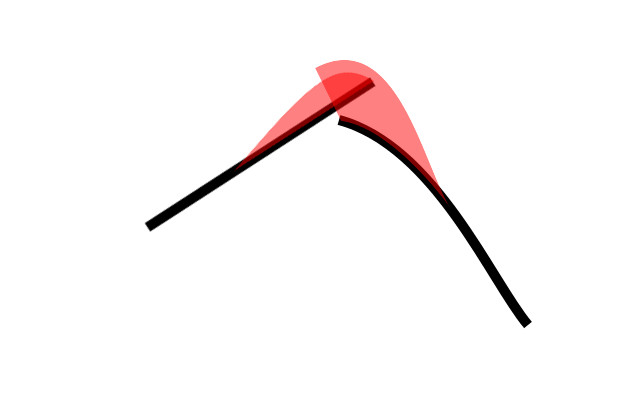
Another note about rigging up the feathers this way. You want to make sure you have the fishing line go through the middle of the feather. To illustrate, ANOTHER AMAZING PICTURE:
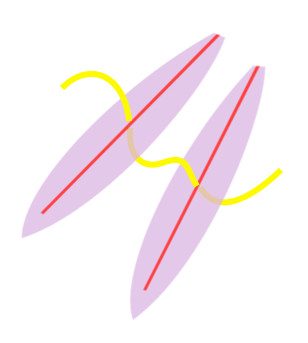
The yellow line is the fishing line. It goes in the “top” of the feather and out the “back”, and then into the “top” of the next feather, and out the “back” again, etc. Doing it this way makes it so the feathers can collapse on top of each other. Otherwise, the fishing line will get caught on the edges of the feathers.
If you’re going to make your own feathers, not all of them need a wire core. In fact, the majority of the feathers were smaller, and simply glued onto the craft foam. From here on out, it’s just a matter of gluing lots and lots of feathers everywhere. DO NOT leave this until the week before the con to do this. Give yourself plenty of time, because it’s going to take a lot more time than you’d think.
No really. Be kind to yourself, and plan for a lot of feathering time.
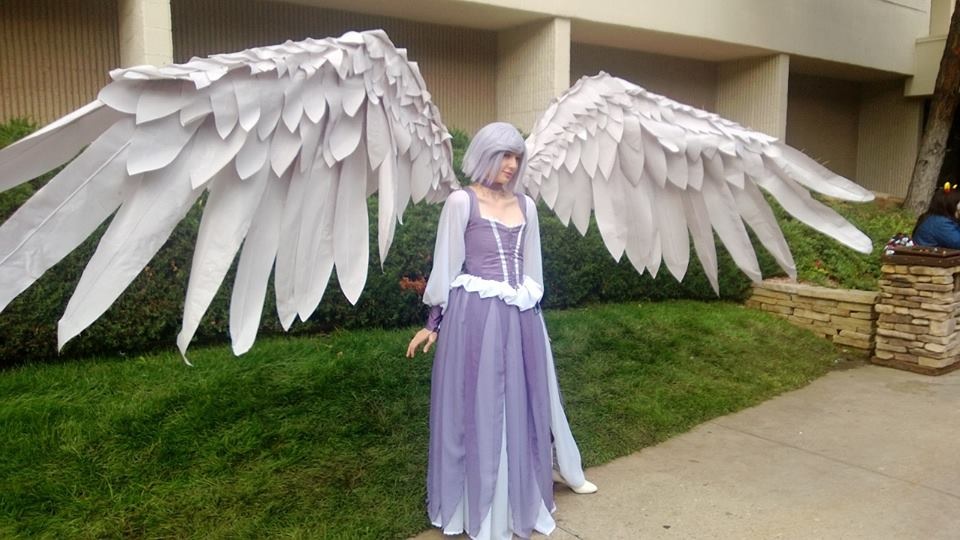
When all is said and done, through many trials and errors, you’ll end up with something like this:
This is just the way we figured out how to do it. All of you folks out there have the ability to take these ideas, and make it WAY better. Go out there and make something EPIC, people! And tell us about it!! Seriously, I can’t wait to see what you’re going to make!
Until next time,
– El 🙂


How heavy were the wings(+harness) approximately?
What size gauge wire did you use within the feathers?? Great job btw!
If I understand you, you mean the “core” of each feather? We used 9 gauge galvanized steel, like this:
http://www.lowes.com/pd_52685-37672-122062___?productId=3034569&pl=1&Ntt=galvanized+wire
At least, I *think* it was 9 gauge. I’ve long since thrown out the packaging, and I’m basing my guess on the diameter of the wire. I did have to use a couple of lengths of wire for the longest feather at the very end. It had a tendency to droop or bend with all the movement, so it needed a bit of reinforcement. Thanks for the question!! 😀
I was wondering how to feathers splay? is the fishing line connected to the wire that you pull to open the wings? btw I love your wings and thanks you soooo much for putting up this tutorial!!!
how do the*
How long did it take you to make these?