So, you’ve got the straps. Onto the PVC slots:
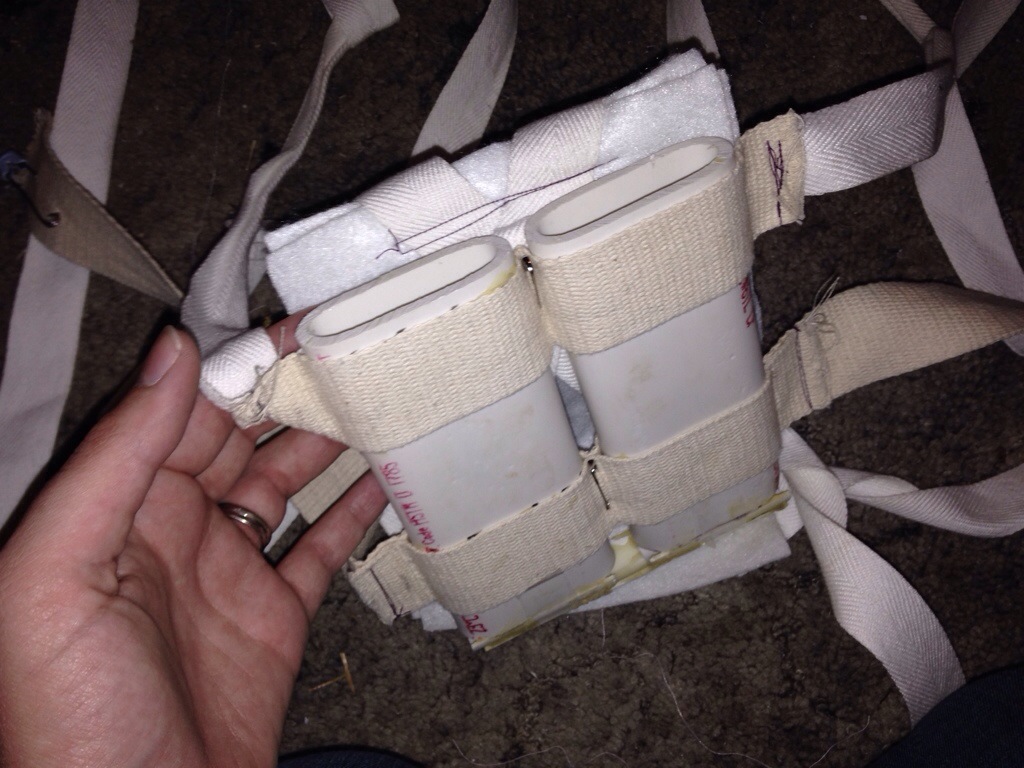
The PVC slots are the part that hold actually hold the wings on your back. For this, you will need:
– a section of 2in PVC pipe. You’ll need about 1 ft total. I got a pre-cut 2 Ft section, and that worked pretty well.
– 3/4 in PVC pipe (you may have some left over from making the wing skeleton)
– your heat gun
– a generous amount of plastic epoxy
– rough grit sandpaper
– 1 1/2″ cotton strapping (the same that you used for the harness waist strap)
Making the PVC slots for your Wing Harness
To make the slots, you’ll need to flatten the 2 inch PVC. The slots themselves will be 6 inches long each, so if you got a 2 ft section like I did, you won’t use all of it. It’s actually really useful to have the extra amount of pipe – it makes it easier to handle while it’s hot.
You’ll want to flatten the PVC, but not all the way. Leave a gap in the middle big enough to slip the flattened portion of the wing skeleton inside. The gap will look like this:
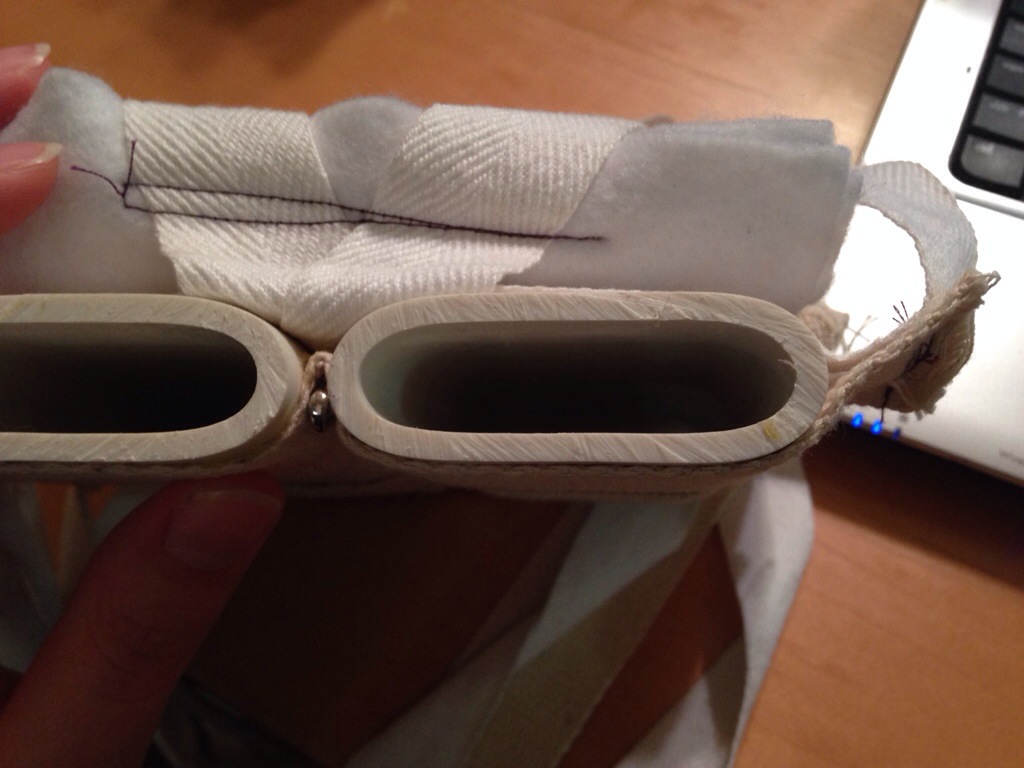
Get out your trusty heat gun, and start heating up your PVC pipe. Same warnings apply as before – do it outside, don’t injure your self or torch anything. You don’t want to scorch the PVC; you just want to make it soft enough to shape. When the PVC is pliable, you can flatten it (like you did for the wing skeleton). I used a brick to smash the pipe against the driveway. Smash the pipe enough so that you make a narrow slot. Keep steady pressure on the pipe to maintain the shape until it cools.
If you’ve done it right, you’ll be able to easily slide the wing skeleton into these slots, like this:

You’ll want to test this before you get to far along in the project. If the slot is too to narrow, just heat it up a bit to let the PVC loosen. The PVC will try to morph back into its original shape when it gets toasty again, so you’ll want to apply pressure to maintain the shape you want until it cools again.
Now, if you’re testing out how the slots work with your wing skeleton, you’ll notice that there’s space on the sides of the slot. Don’t worry about this. We have a fix for that that we’ll cover in a later post.
Next, you’ll close off the bottom of the slots with the left over 3/4 inch, like this:
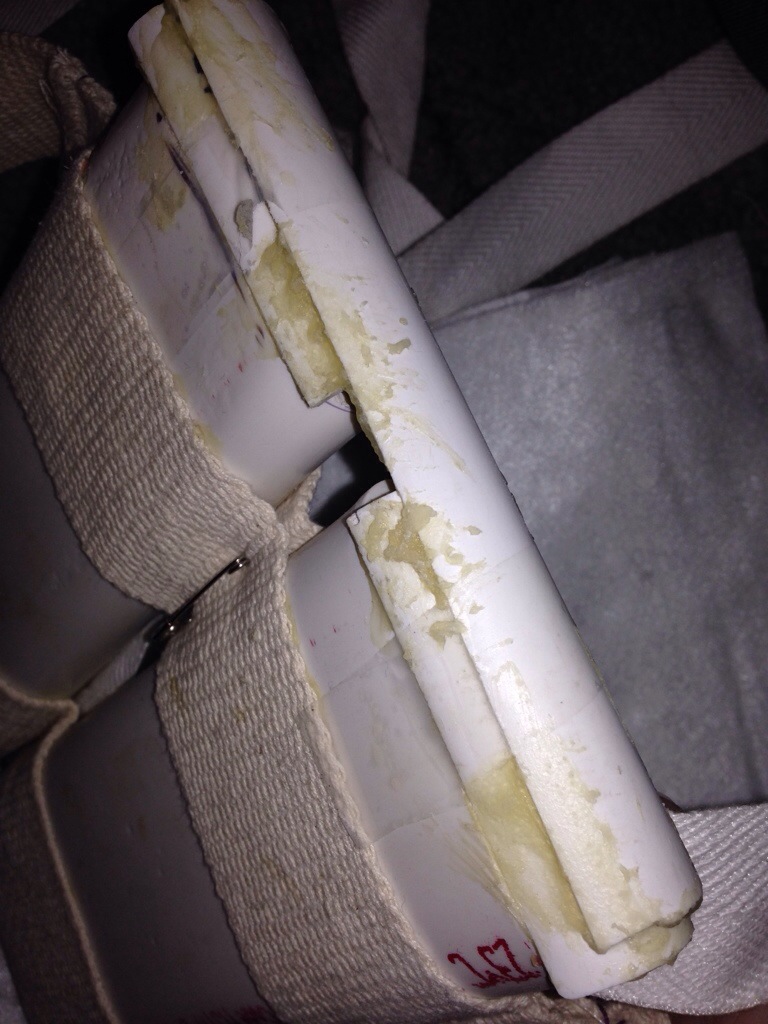
So, what’s going on in this picture, you may ask? It’s a hacked together mess of epoxy, but it worked. First, the wings were sitting uneven vertically in the slots, so we used some of the leftover 3/4 pipe (cut in half lengthwise) to seal off the bottom. The wing pieces can rest on this so that they both sit evenly in the slots.
You’ll also notice that there is another longer piece of 3/4 in pipe epoxied across both slots. This is actually extremely important. It prevents the slots from moving independently of each other. Without it, the weight of the wings cause the two slots to pinch together and dig into your back. It’s VERY uncomfortable.
A note on epoxy: it has a stank that will take over your house. Use epoxy in a well-ventilated area, for your safety and to maintain a stank-free house. The piece will continue to smell (though less and less as time passes) until it fully cures, which can take days.
Attaching the PVC slots to the Harness Straps
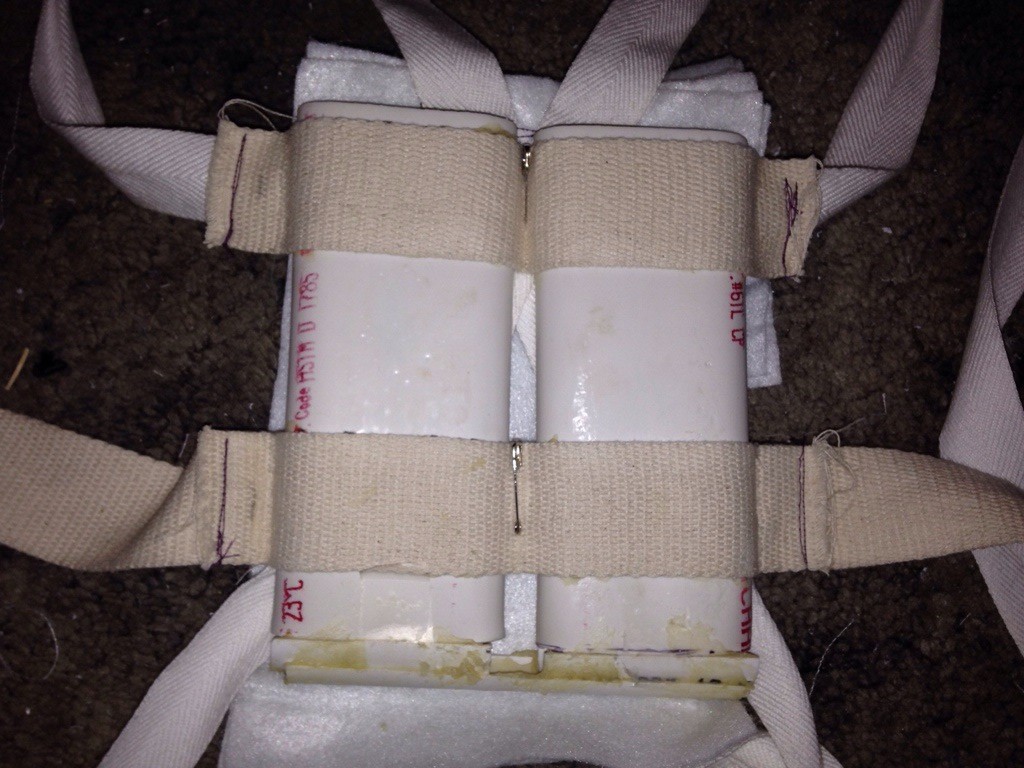
Now that the PVC pieces are assembled, the final step is to attach the slots to your harness, like so:
The big tan strap at the bottom in this picture is the waist strap of the harness. We wanted the bottom of the slots to rest at the small of the back (more or less). You may want your wings to rest on a different part of your back. You can always put the harness on, have a friend hold the slots up to your back, and mark on the slots where the straps will attach.
Once you know where you want the straps to go, rough up the surface of the PVC with some sandpaper, and epoxy the straps down.
…beware the epoxy stank.
Next, you’ll add some supporting straps to the front. Take the same 1 1/2 in cotton strapping you used for the waist strap, and epoxy them across the front so that they line up with two of the straps along the back. Once the epoxy has set enough to handle, sew down the front straps to the back straps as tight as you can.
You may notice the white material behind of the slots. Since the slots and harness were going to be under Angela’s corset, we sewed a few layers of felt to the straps to give it some cushioning. +10 to comfort.
Ok… Wing skeleton – check. Harness straps – check. Harness slots – check.
Next, we’ll talk about making the whole thing move, cover a few little (but important!) structural details, and getting the wings ready for feathers.
Thanks for reading! 😀




I’ve been struggling with a good solution (that isn’t too shoulder/neck heavy) for big, heavy wings… Thanks for posting your process! I think I’ll be able to use a lot of this to make it happen. If I do, I’ll let you know!
Thanks Triene! Best of luck to you 😀