

Before I start, here’s the plan. I’m going to write up this “Articulated Wing” tutorial in parts. Once all the parts are posted, I’ll compile them together in one massive articulated wings tutorial post so it’s easier to find everything in one place. So, with that, here we go! First up…
Articulated Wing Skeleton
These are the things we used:
- PVC piping:
- 1 10ft length of 3/4 inch – cut in half (for the two “outer wing” pieces)
- 1 10ft length of 1 inch – cut in half (for the two “inner wing” pieces)
- A heat gun (we got one for about $30 at the hardware store)
- A type of metal banding called “Galvanized Hanger Iron” (It ought to be near the PVC piping in the hardware store)
- Plastic bonding epoxy
- Two sets of 2 inch bolts and corresponding nuts
- And the magic ingredient – roller skate wheels
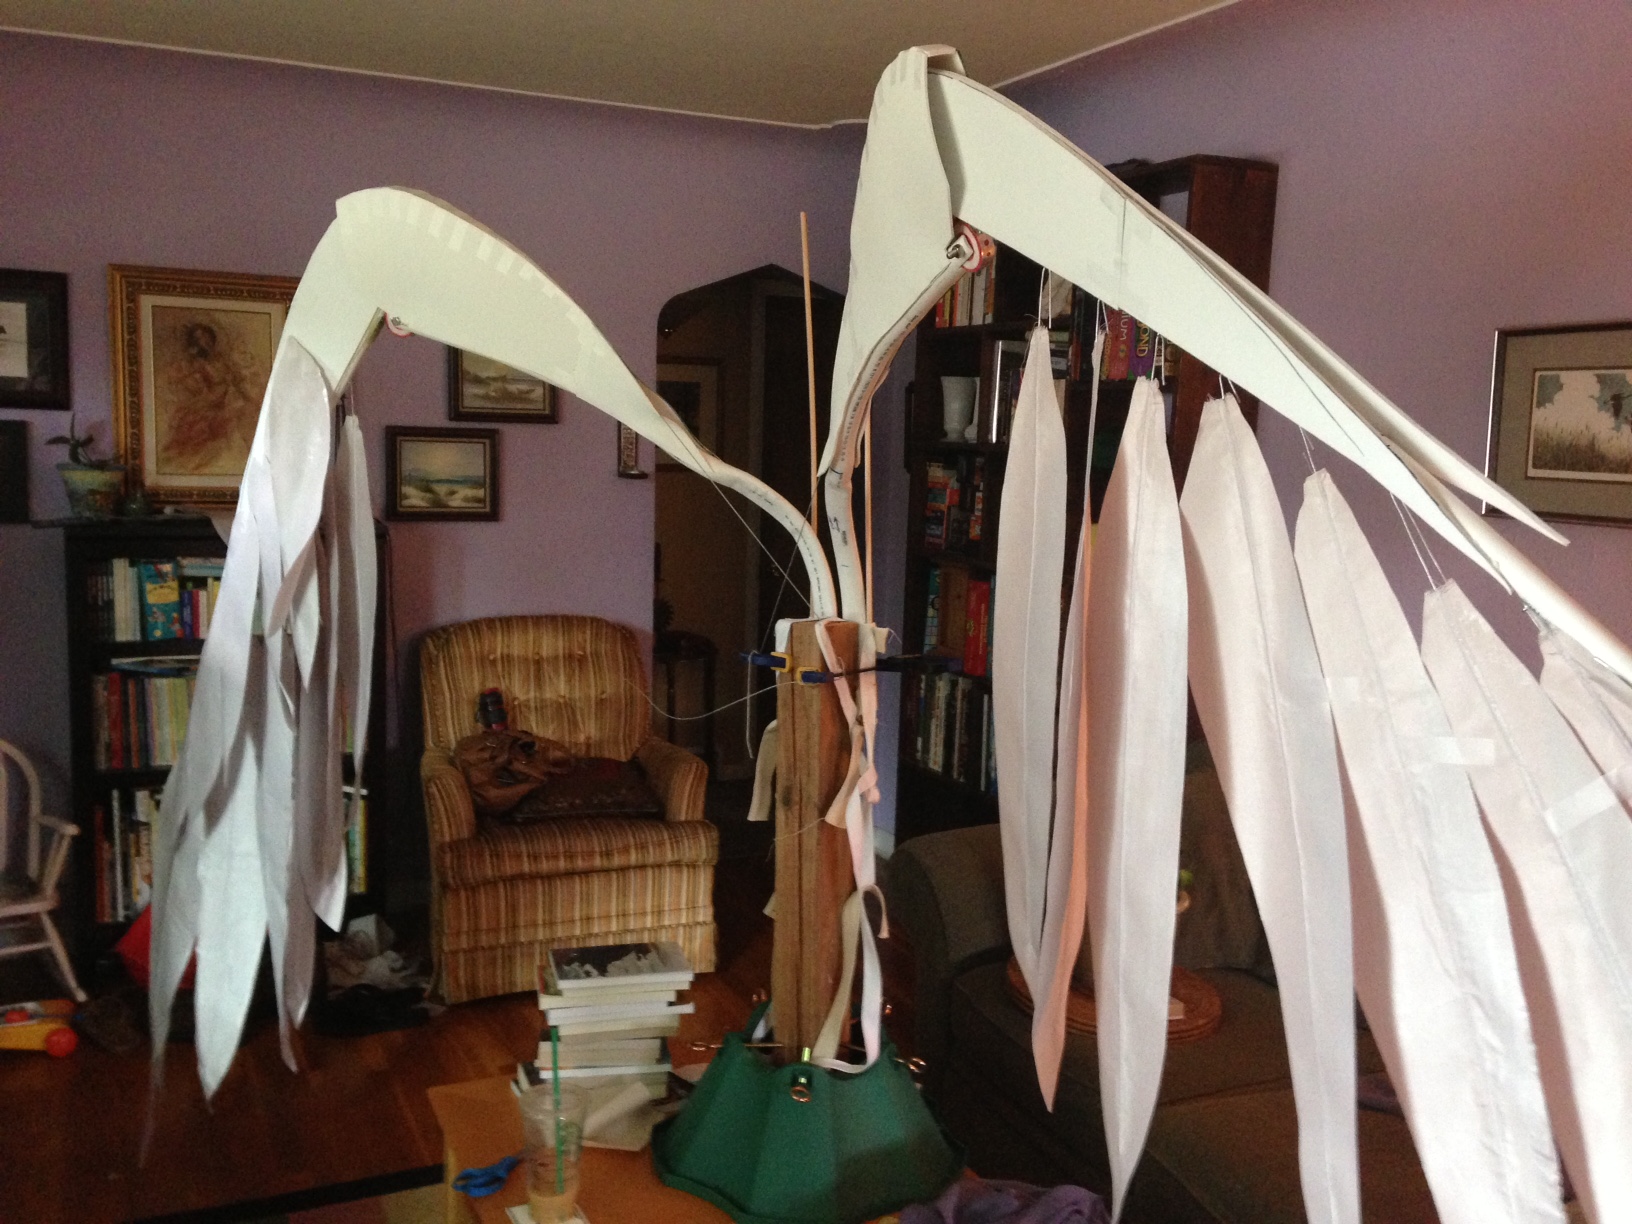
Here’s an overview picture:
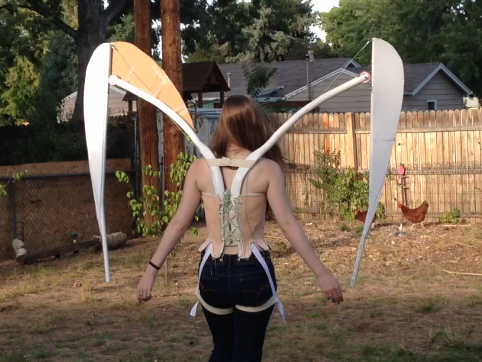
Each wing has two pieces – the “outer wing” and the “inner wing” – connected in the middle by the joint. The joint is disguised by two “housings” that attach to each piece of PVC (which we’ll post about later). The inner wing is the piece that is closest to the body, and goes down behind the back, and it fits into the harness (which we’ll also post about later). The outer wing is the piece is furthest away from the body, and that extends.
Building the Wing Structure
So, you’ve got the two 5 ft. pieces of 1 inch gauge PVC pipe for the inner wing. The first task is to mold the inner wing into the right shape.
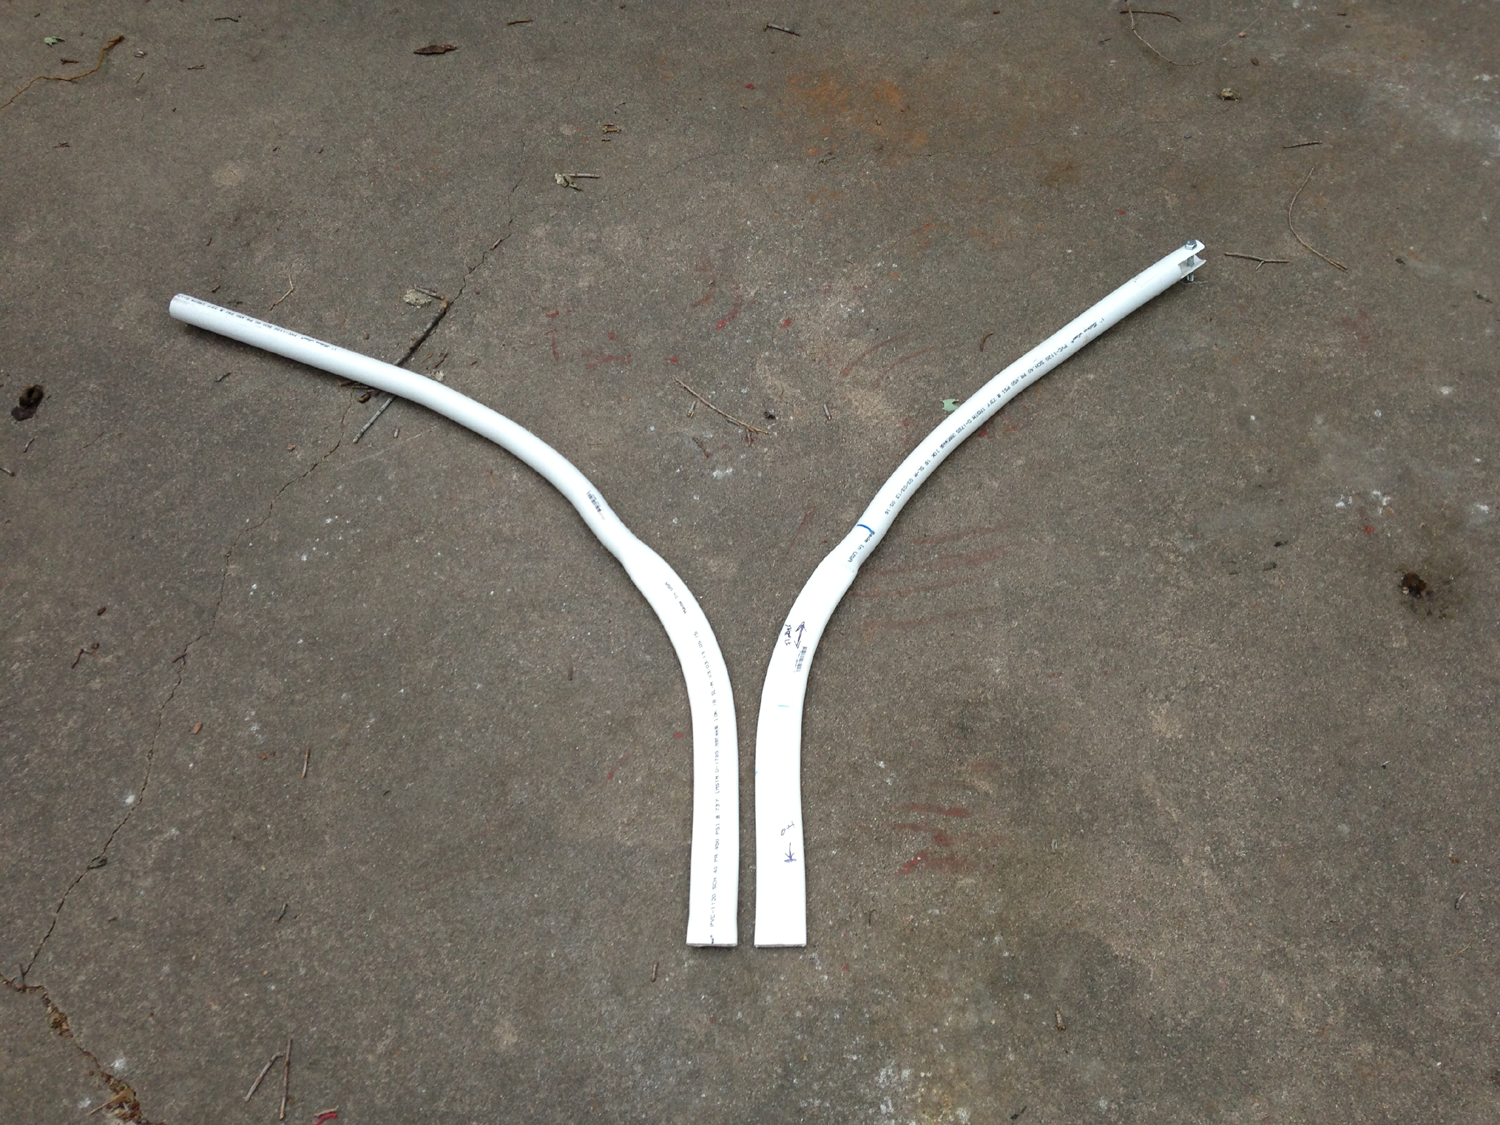
There are three goals:
1) Flatten out the bottom half of the pipe. This is the part that goes behind the shoulder and down into the harness.
3) Mold the flattened portion to match the contours of your back. You’ll want to leave the bottom most 6 inches of the pipe flattened and straight. This is what will slide into the harness.
2) Make the arc from the shoulder up to the joint.
This is not an easy task, and will take some trail and error.
***DO THIS OUTSIDE (or in a well ventilated area). Don’t burn yourself or others… or anything else, for that matter***
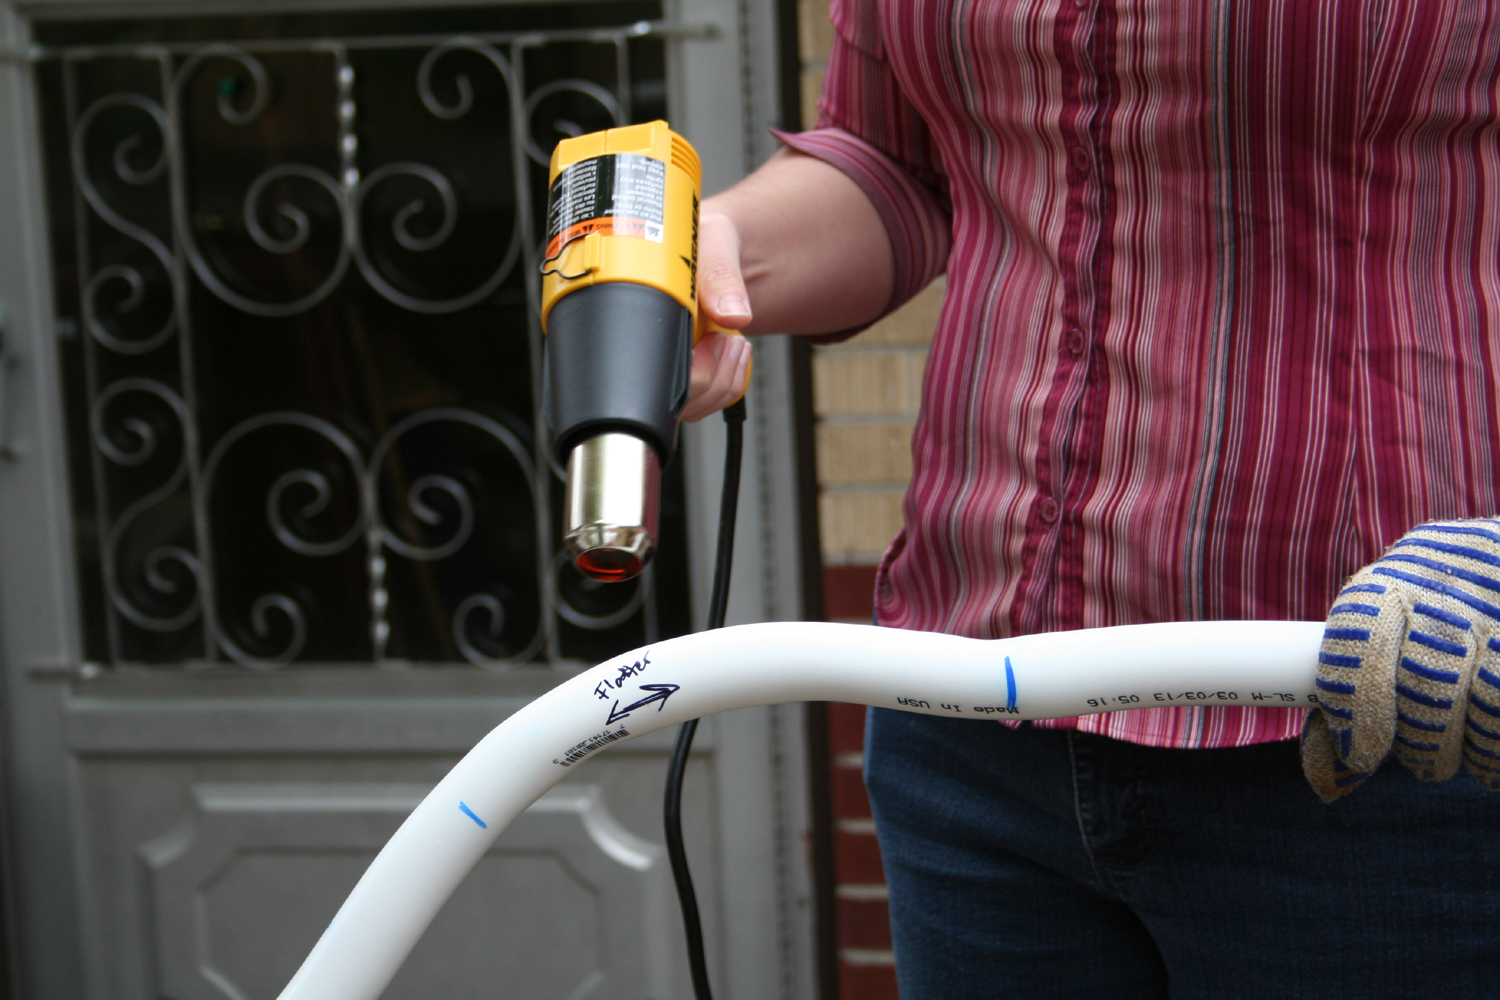
The heat gun we used had a high setting of 1000 degrees, and that worked well for heating and molding. Point your heat gun at a section of PVC a few inches away from it. Rotate and move the PVC so that a section of the pipe has been evenly heated. I found that heating up a 6 inch section at a time was manageable. You can toast PVC, so keep the heat gun moving. Smell that hot plastic? Mmmm… chemicals. That’s why you’re doing this outside.
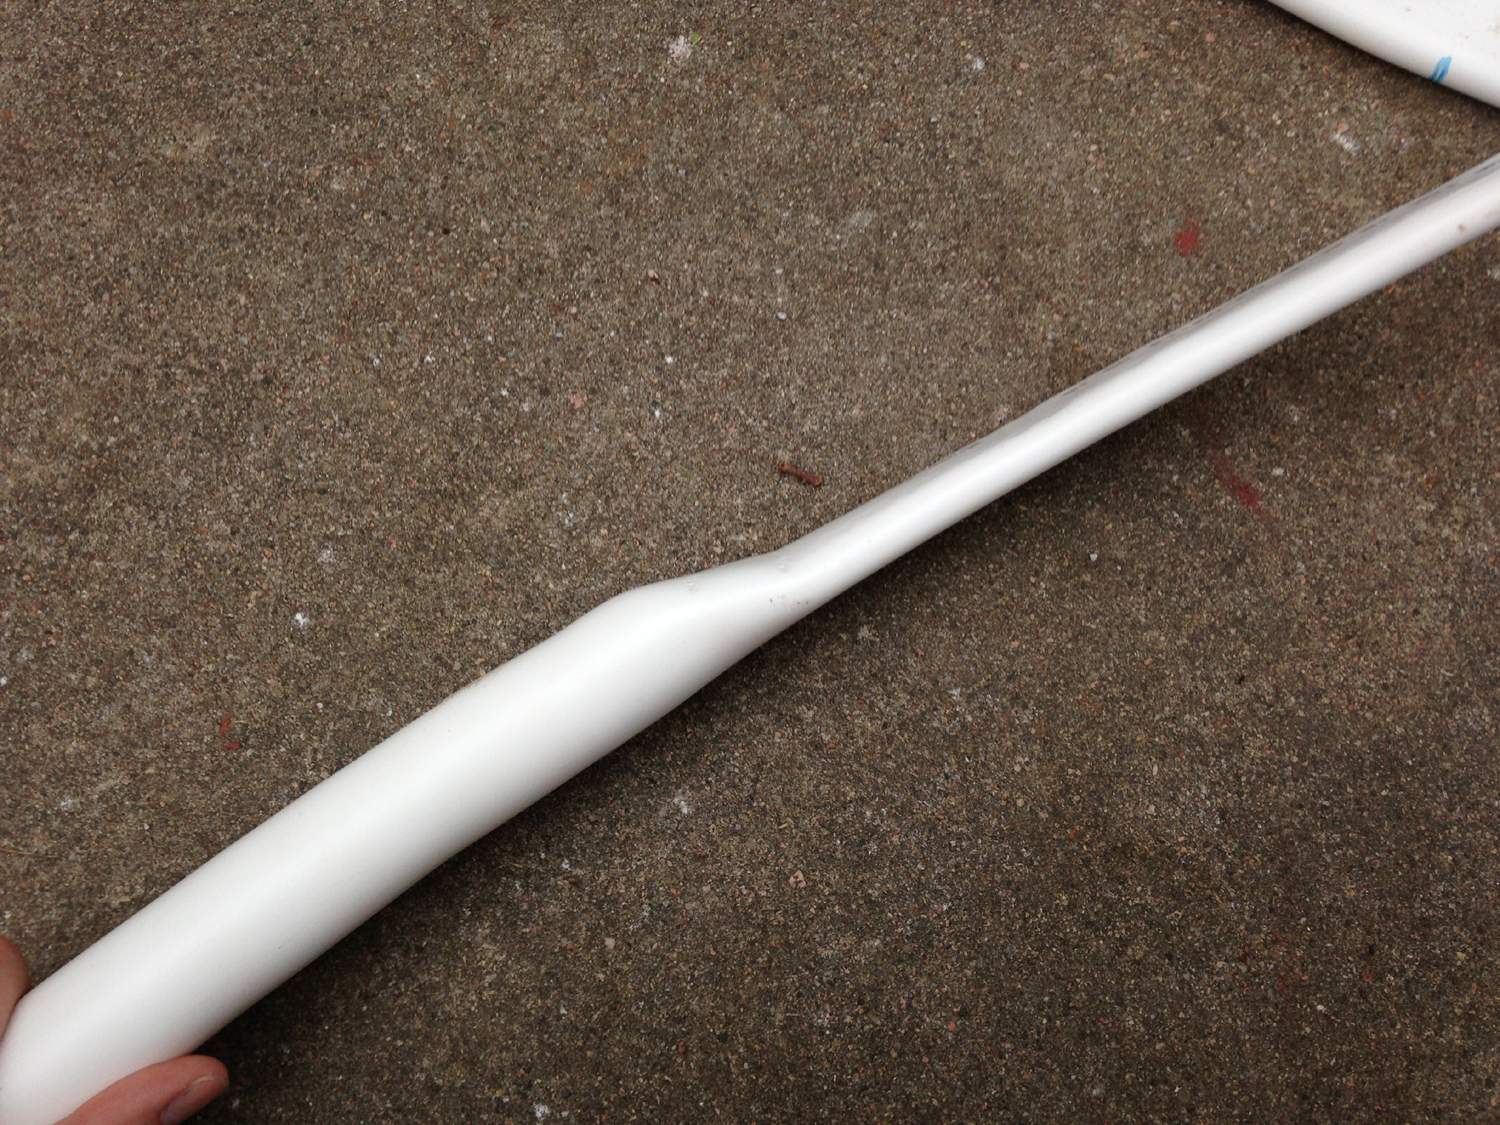
When the PVC is pliable, turn off the heat gun, and (with an oven mitt, welding glove, or other sturdy/insulated glove) bend the PVC and hold it in place until it cools. To flatten a section, I used a brick to smash the pliable section on the driveway. It’ll look something like this:
Some notes:
- When you first take the heat gun to the PVC, it will take the pipe a little while to heat up. Subsequent times will not take as long because the pipe is already warm. Remember this, or you might over-toast your PVC.
- PVC has a memory and will try to revert to its original shape when heated up. This can make bending/curving the flattened sections difficult because the PVC will try to unflatten. Be more stubborn than your material. Be patient and go slowly.
- The single most difficult part of this process is making the two inner wing pieces arc symmetrically.
Almost all the heat molding happens to the inner wing. Give yourself time to experiment and fine tune. Expect to hold them up to your back repeatedly until you get the shape you want. You can bend the outer wing as well if you like – it all depends on the shape you want for your wings.
Note: When determining the shape of the inner wing, remember that you will want your inner wing piece to be about 8 inches shorter than the final height to accommodate for the housing that hides the joint.
The Wing Joint
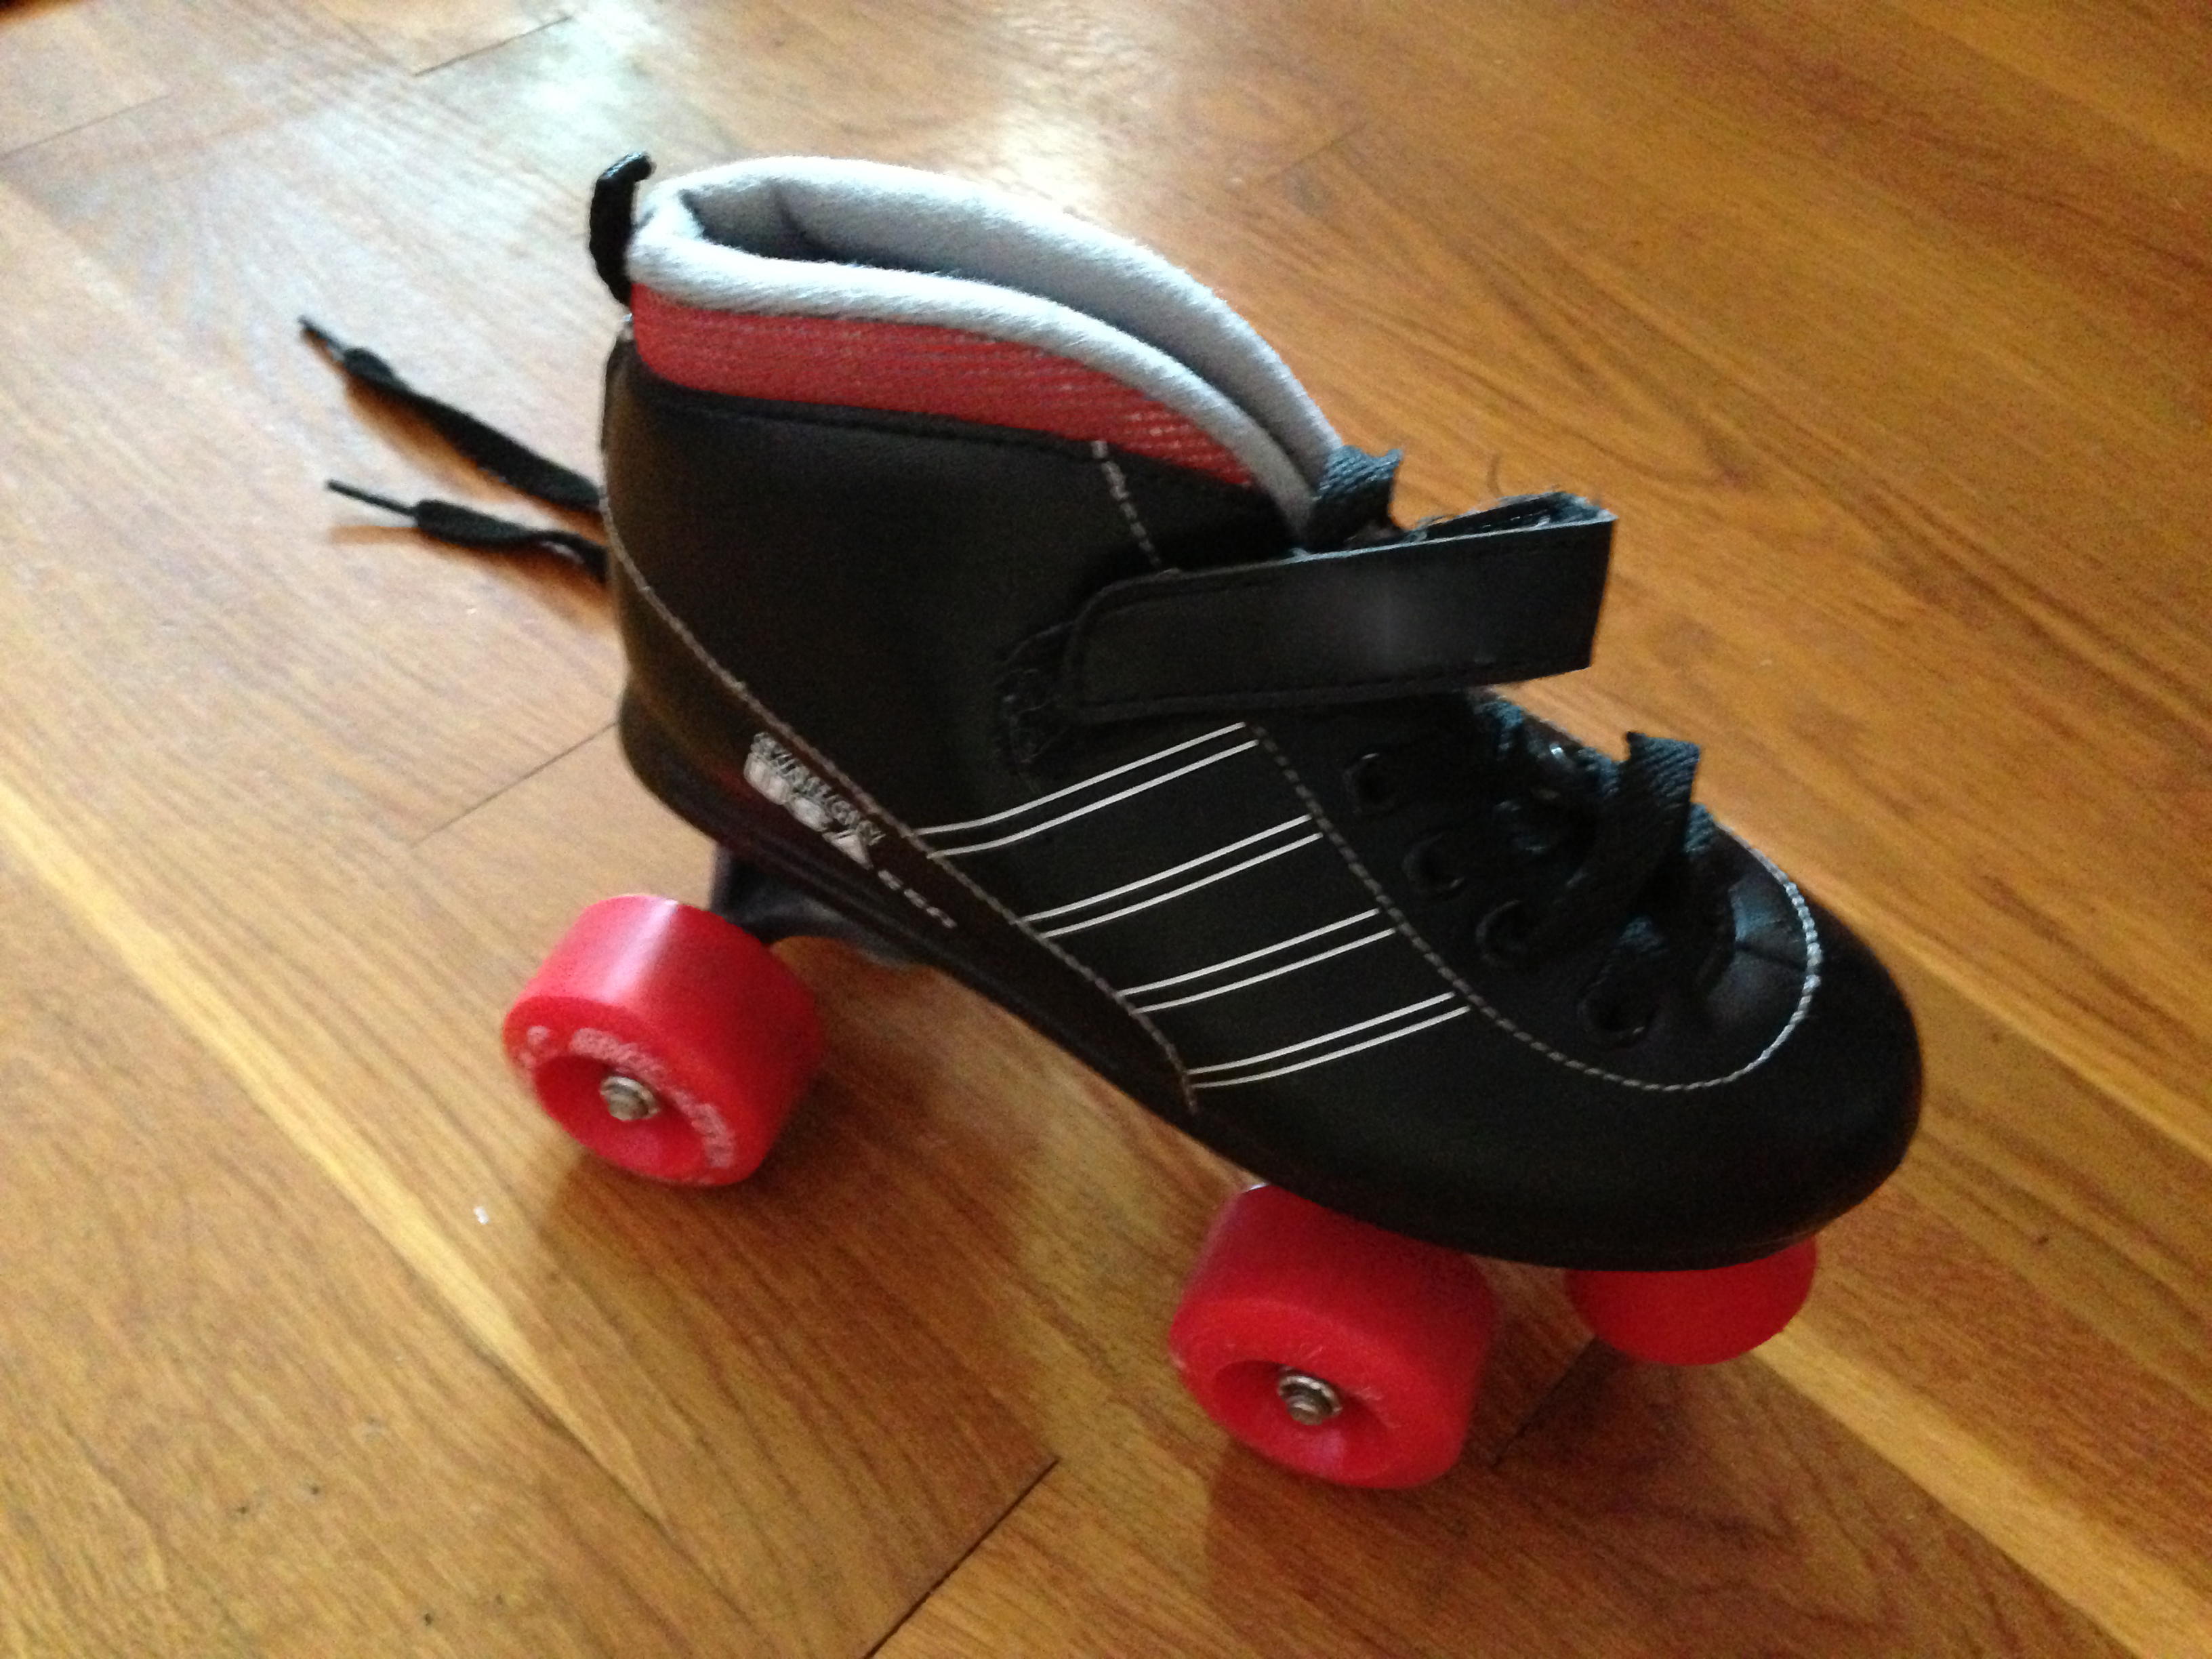
On to the joint! This was Bee’s stroke of genius. Roller skate wheels are built to smoothly rotate, and are super sturdy – perfect for an articulated wing joint. We got a pair of kid’s roller skates from the thrift store for about $4. You’ll need wheels that are flat around the outside, so roller blade wheels won’t work well.
We wanted to make the joint as slender as possible, so we actually cut off part of the wheel so that the whole thing was about 3/4 of an inch thick. We screwed the metal banding around the wheel, and attached that to the outerwing piece of PVC about 8 in down from the tip. Like so:
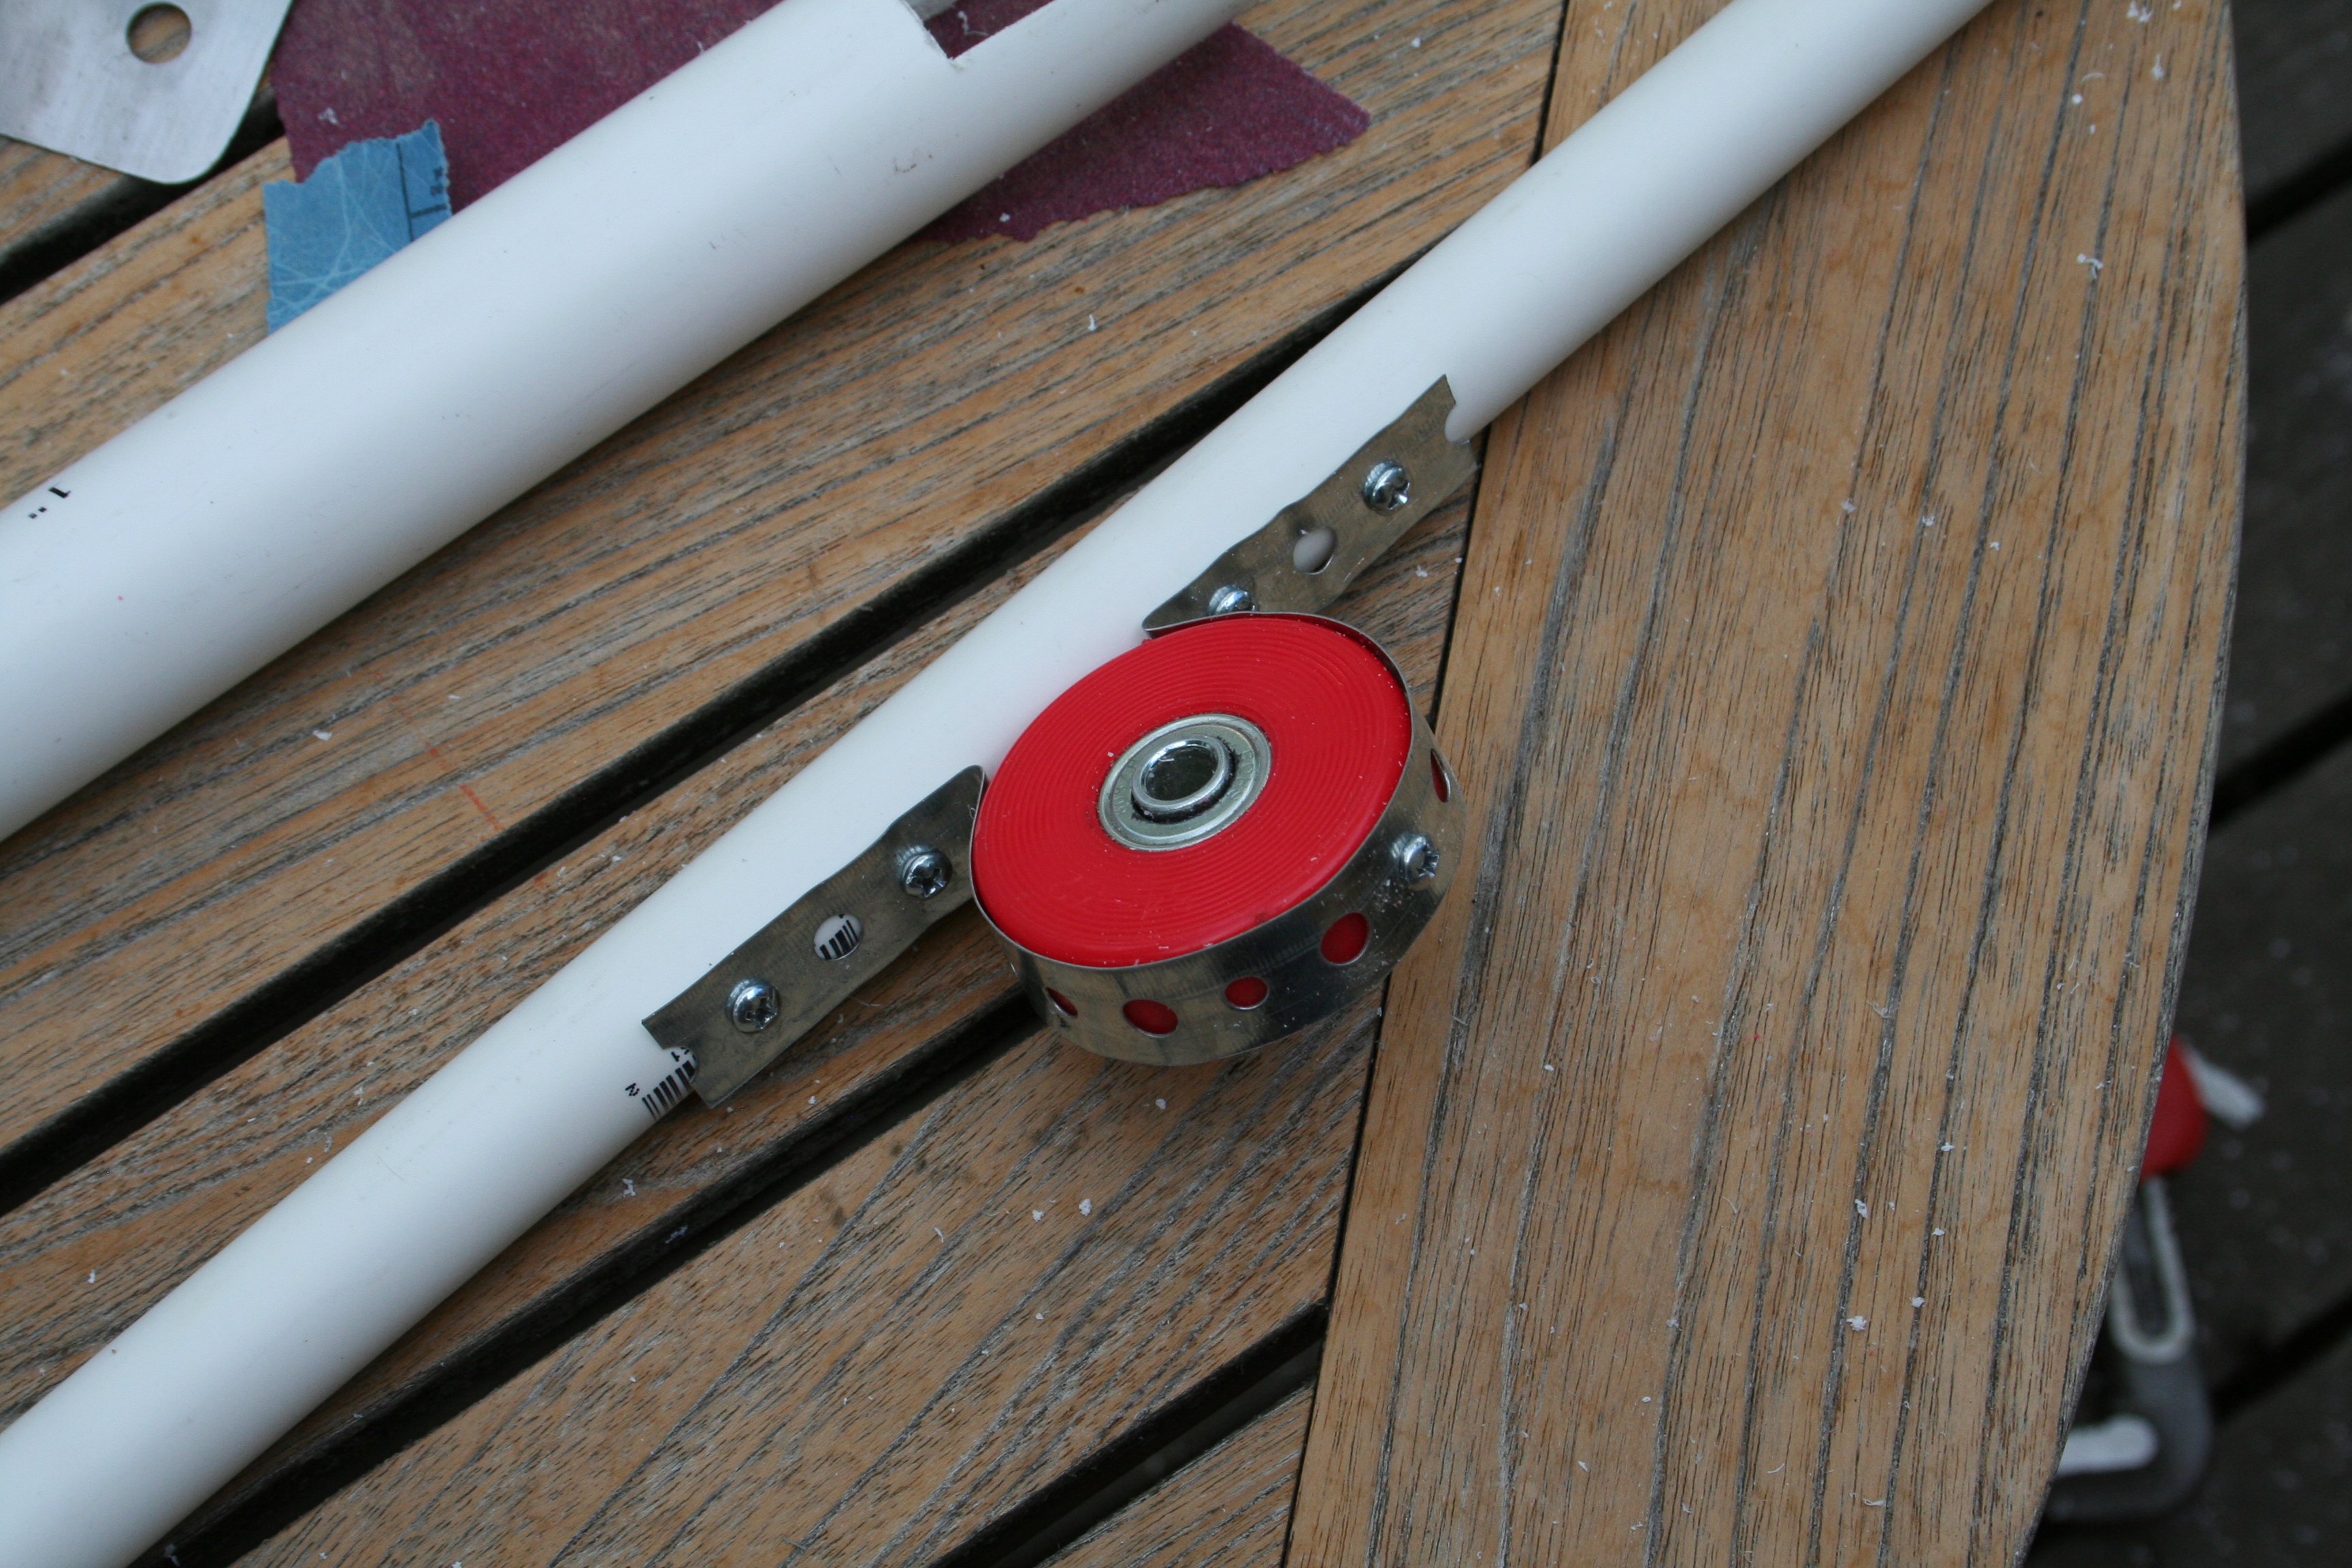
We were paranoid and epoxied the heck out of the metal banding where it attached to the PVC. The metal banding is one of the areas that we were concerned would fail due to stress. I’m not sure how much help the epoxy actually is, but… hey… it made us feel better. 🙂
To finish the outer wing, screw an eye hook underneath the short end of the lever (on the same side as the wheel). You’ll attach the wire to this to pull downward and extend the wing.
Attaching it all together
To attach everything together you’ll need to make the “saddle” to hold the bolt at the end of the inner wing piece. You’ll want to cut out a notch slightly bigger than the thickness of the roller skate wheel, so in our case, a smidge over an inch. Make the notch deep enough that the center of the wheel lines up about an 1/2 inch into the notch.
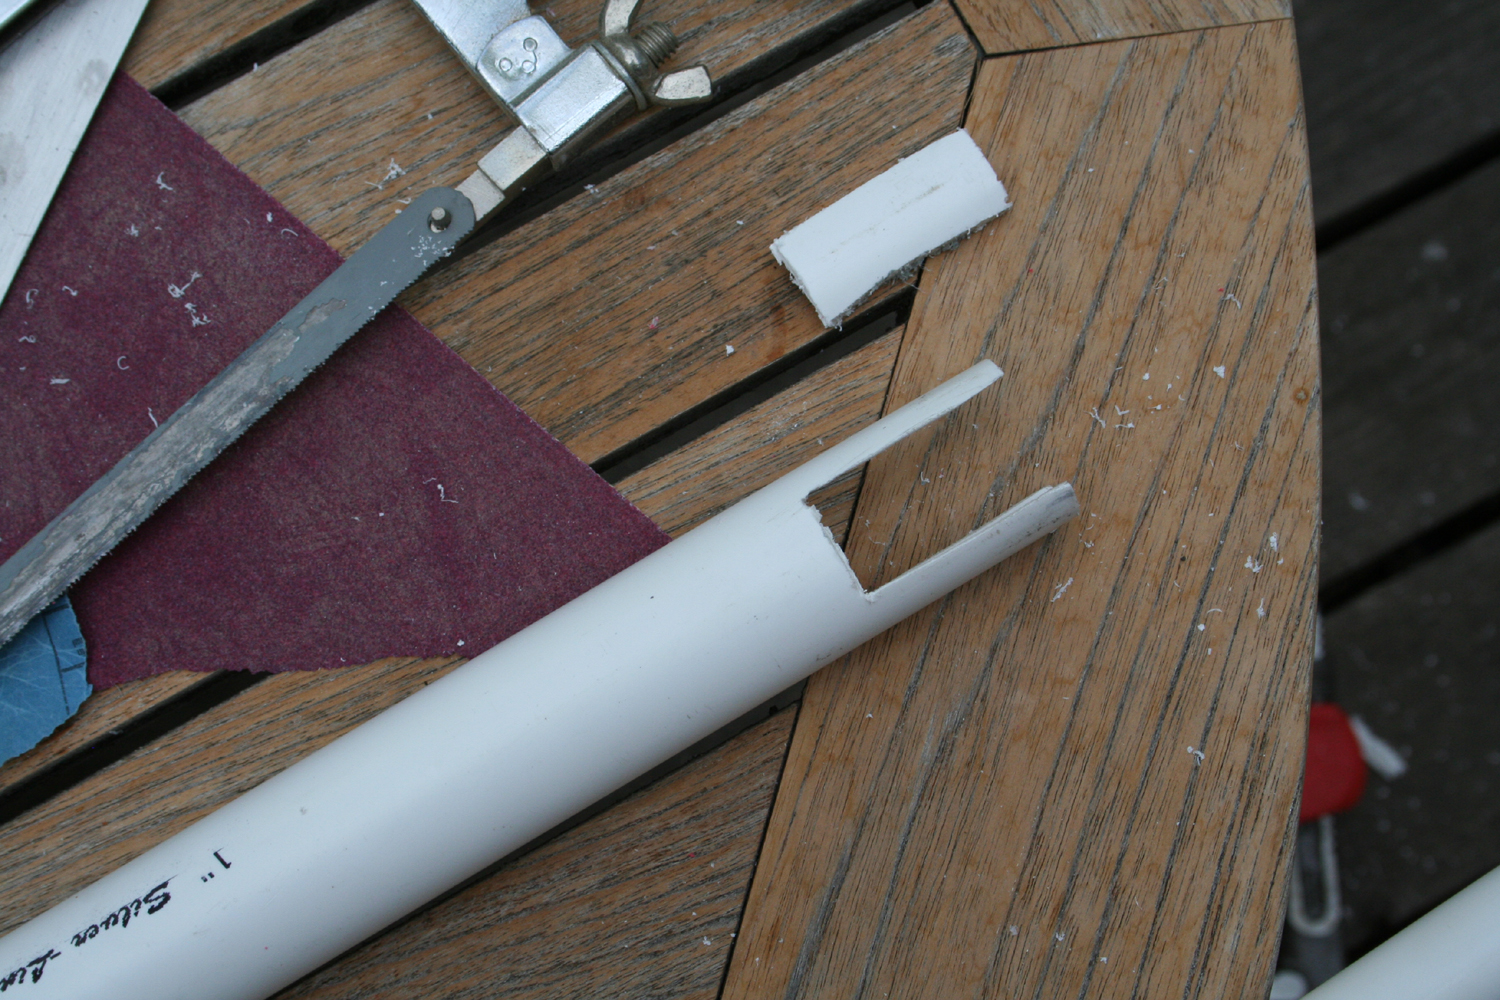
Note: Make sure that these notches are the same on both inner wing pieces. The notches need to be at the same angle, otherwise the outer wing pieces will hang in different directions when attached.
Now that you’ve cut out a notch, you’ll have two tabs on either side of each inner wing pipe. You’ll want to drill a hole through both of these tabs for the bolt. The bolt will be the axle through the roller skate wheel. Line up the wheel inside the notch to determine where you need the holes to be drilled. When theholes have been drilled through both sides, align the wheel, pop the bolt through and twist on the nut.
Ta da! You have the joint!
At this point, you should have the basic articulated wing structure! Next, we’ll post about the wing harness.
Thanks for reading! If you have any questions, feel free to send us a message on Facebook, or email us directly at laureltreeworkshop at gmail. If you use anything you read in this post for a costume, please let us know!! We would LOVE to show off your handy-work too!!! 😀


I LOVE YOU SO MUCH THANK YOU BLESS YOU
I was wondering how you make the wings move. I can see a wire in the pictures, but can’t quite tell how they are used to lift the wings.
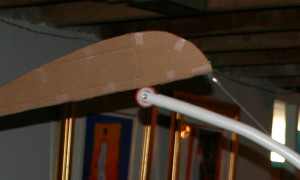
Here’s an amazingly drawn picture that will hopefully explain how the wires work to make the wings move:
There are the two pieces of the wing – the outer wing piece (attached to the wheel) in blue, and the inner wing piece (which the wheel attaches to with a bolt) in red. The yellow line is a wire that is attached to the tip of the outer wing. This runs down the back to where you can grab it and pull down. When you pull down on the wire, the far left part of the wing (in this picture) moves up like a seesaw. Hope that helps!
Hello! This tutorial is great but I have one question about the hinge. When screwing the metal banding around the wheel onto the outer wing section, what keeps the wheel in place to stop it from slipping out of the metal banding?
We put some screws through the metal banding and into the wheels themselves. We also used a lot of glue!
i must know what the final wings look like. This is ingenious!!!! Thanks for sharing
can u make a video?its a bit confusing n I have a play day after tomorrow!!!!! though this was d best n d easiest one but I am no that confident of making it now…